 |
| Wonky Log Cabin Placemat in Progress |
Showing posts with label sewing. Show all posts
Showing posts with label sewing. Show all posts
Wednesday, December 7, 2011


Tuesday, December 6, 2011
Truth #1

The saving grace is that the fabrics look pretty together, don't you think?
Sunday, December 4, 2011
Laying it All Out There
This weekend I cut all of the strips for the 16 blocks for Levi's bed quilt and did a possible lay out. I'm sure I'll rearrange these blocks MANY times in the next week. There is going to be black sashing between each block, as
well as around the border. The binding will be either yellow with black
pindots or black with cream pindots. Those fabrics, along with the
backing, have been ordered and will ship tomorrow. The backing is all
kinds of retro awesomeness. You can view it here.
Here's how the layout looks right now:

Viewing it on screen, I can already see things that need rearranging, for example, the block in the bottom row, third from the left looks jarringly like an "S," and the reds blend together in the block in the top row, second from the left. And I don't like the black blocks in the middle section.Also, I think I want to rotate each block 45 degrees. Or maybe every second block 45 degrees. I'm not sure. What do you think?
Oh! Are you wondering what I'm using to lay out the blocks? At first I was going to use one of our walls as a design wall by covering it with a white sheet and using masking tape, like so:

It didn't take long to realize that this was a terrible idea. First, it was finicky working with tape. Second, the tape was causing the fabric to fray when I needed to remove it to rearrange stuff. I could have used pins, but it still would have been finicky, plus 100s of straight pins and a nine month old baby are a bad combination (recall, my craft room is also my living room and my dining room and the play room and the laundry room and so forth). Finally, Levi thought tugging the white sheet and trying to rip it off the wall was SO MUCH FUN. I needed a new plan.
My brother in law gave us a ton of microfibre 11x11 inch clothes which we use to wipe Levi's face after each meal. Fabric clings to mircofibre beautifully! No pins! I can move the squares around to my hearts content. Problem solved!
I ended up cutting waaaaay too many fabric pieces. I guess that's what happens when you are modifying a pattern. Also, it was only once I started laying out the blocks that I decided to use the same five prints in two blocks (the block on the bottom left and the block in the second row from the bottom, second from the right are the inverse of each other). This meant cutting additional pieces to get the right compliment. I probably have enough left over scraps for another whole project! Its a good thing I really like this fabric line.
I'm hoping that some of my crafty friends will be able to visit me this week to help with the layout. I'm itching to start piecing but know I have to get the placement right or else I won't be happy with the finished project. Stay tuned!
Here's how the layout looks right now:

Viewing it on screen, I can already see things that need rearranging, for example, the block in the bottom row, third from the left looks jarringly like an "S," and the reds blend together in the block in the top row, second from the left. And I don't like the black blocks in the middle section.Also, I think I want to rotate each block 45 degrees. Or maybe every second block 45 degrees. I'm not sure. What do you think?
Oh! Are you wondering what I'm using to lay out the blocks? At first I was going to use one of our walls as a design wall by covering it with a white sheet and using masking tape, like so:

It didn't take long to realize that this was a terrible idea. First, it was finicky working with tape. Second, the tape was causing the fabric to fray when I needed to remove it to rearrange stuff. I could have used pins, but it still would have been finicky, plus 100s of straight pins and a nine month old baby are a bad combination (recall, my craft room is also my living room and my dining room and the play room and the laundry room and so forth). Finally, Levi thought tugging the white sheet and trying to rip it off the wall was SO MUCH FUN. I needed a new plan.
My brother in law gave us a ton of microfibre 11x11 inch clothes which we use to wipe Levi's face after each meal. Fabric clings to mircofibre beautifully! No pins! I can move the squares around to my hearts content. Problem solved!
I ended up cutting waaaaay too many fabric pieces. I guess that's what happens when you are modifying a pattern. Also, it was only once I started laying out the blocks that I decided to use the same five prints in two blocks (the block on the bottom left and the block in the second row from the bottom, second from the right are the inverse of each other). This meant cutting additional pieces to get the right compliment. I probably have enough left over scraps for another whole project! Its a good thing I really like this fabric line.
I'm hoping that some of my crafty friends will be able to visit me this week to help with the layout. I'm itching to start piecing but know I have to get the placement right or else I won't be happy with the finished project. Stay tuned!
Zippity Do Da Day

The class was awesome. Not only did I learn to sew a zipper, but I also got to use a serger for the first time! Since the class, I have been zippered pouch obsessed. The best thing about zippered pouches is that you need very little fabric - I've managed to make three pouches with only two fat quarters and I still have leftover fabric. Here are some of the pouches I've made so far.

This pouch was made in class. I'm using it to store my various threads and bobbins which feels appropriate because of the fabric I chose. Aren't the scissors cute?

This is the other pouch we made in class. I adore the fabric I used on the outside. It's from a line called Bohemian Soul and it has taken great restraint not to buy the entire line. I decided to gift this pouch to my sister for her birthday which meant making a companion piece. I photographed the process.

Here you see the pouch after the zipper has been installed.

This is a view of the interior fabric. I'm about to sew the bottom seam. Once I've done that I'll centre the zipper to the seam and sew the sides, like so.

Finally, I box the corners...

And voila! A zippered coin purse!

I hope she likes them!

These two pouches were made for my friend Miriam. No special occasion, just because I wanted to give her a little something. It's hard to see in the photo, but the teal fabric has golden sparkly stars.

Last but not least is a pencil case I made for my husband. The one he was using was from his university days, had holes and was generally grimy.
 UPDATE! I made one more! This one was for my friend Rachel. I whipped this up in an hour. Rachel was visiting from Israel and I hadn't seen her over a decade. A little friendship gift was definitely in order!

Saturday, December 3, 2011
Next Up...

P.S. I do intend to blog about the finishing of the Watch Me Grow Chart. Really.
Monday, November 28, 2011
Watch Me Grow Progress Update
I'm getting to the final stages of my Watch Me Grow chart that I started months and months ago. Last night I basted my quilt sandwich. For the non-quilters out there, this means that I layered my backing, the batting and the top of the quilt, and used special curved safety pins to hold the layers together. Here's what it looks like post-basting:


I also cut my binding tape. After some research, I decided to make cross-grain/straight-grain tape instead of bias tape. This means that I cut selvedge to selvedge, instead of on the bias. Apparently, bias tape is only required if one is going around curves, which I'm not. The tape took surprisingly little time to prepare. After cutting five strips, I sewed them together and ironed them in half.

I used a toilet paper roll to roll up the binding and felt mighty clever, let me tell you!

Happy Sewing!
Thursday, November 17, 2011
Now Two Times More Absorbant!
Oh! Hi there! Remember me? I'm still around and crafting up a storm. Levi is significantly more active now, so my blogging time has been greatly reduced. When faced with the choice between blogging or sewing, sewing wins every time. As a result, I have a backlog of projects to share with you, starting with today's creations - double sided receiving blankets (or DSRBs because I'm lazy and don't want to type that out multiple times).
If your baby is a spewer, you need these! I wish I had thought of them eight months ago, when Levi was spitting up after every feed and I was going through upwards of ten receiving blankets a day. Alas, it wasn't until Sara told me how handy the blanket I made for her was, that I recognized their genius. Double the flannel, double the absorbancy! Also, double the cute, since you can use coordinating prints.
My newest nephew was born this morning and I am thrilled to pass along the knowledge that DSRBs are all kinds of amazing to my sister-in-law (and brother-in-law!). I made three today and they are adorable. Behold, my DSRBs:


DSRB's are super easy to make. Take two rectangular pieces of flannel and place them right sides facing together. You can make your pieces any size you like. I like to make extra large blankets, to increase their usability, for example, they can be used as swaddling blankets, stroller blankets or play mats. Next step: seam all four sides. IMPORTANT! Leave a six inch opening on one side for turning the blanket right side out. I used pinking shears to trim my edges and clipped my corners before turning my blanket. Then I used a chopstick to get my corners poking out nicely. Press the edges so that they lay flat (this is particularly important if you choose to topstitch like I did). Top stitche about a quarter of an inch in all around. This last step is optional, but I think adds a lovely detail. And voila! You're done.
If your baby is a spewer, you need these! I wish I had thought of them eight months ago, when Levi was spitting up after every feed and I was going through upwards of ten receiving blankets a day. Alas, it wasn't until Sara told me how handy the blanket I made for her was, that I recognized their genius. Double the flannel, double the absorbancy! Also, double the cute, since you can use coordinating prints.
My newest nephew was born this morning and I am thrilled to pass along the knowledge that DSRBs are all kinds of amazing to my sister-in-law (and brother-in-law!). I made three today and they are adorable. Behold, my DSRBs:


DSRB's are super easy to make. Take two rectangular pieces of flannel and place them right sides facing together. You can make your pieces any size you like. I like to make extra large blankets, to increase their usability, for example, they can be used as swaddling blankets, stroller blankets or play mats. Next step: seam all four sides. IMPORTANT! Leave a six inch opening on one side for turning the blanket right side out. I used pinking shears to trim my edges and clipped my corners before turning my blanket. Then I used a chopstick to get my corners poking out nicely. Press the edges so that they lay flat (this is particularly important if you choose to topstitch like I did). Top stitche about a quarter of an inch in all around. This last step is optional, but I think adds a lovely detail. And voila! You're done.
Tuesday, September 13, 2011
A Lovie For Levi
What is it about tags that babies love so much? If there's a tag on a toy we give him, Levi goes straight for it. He flicks it with his fingers, sucks on it, and sometimes just stares at it. I'd love to know what he's thinking of when he's looking at it with such deep concentration!
I know Levi is not unique in his love of tags, because there are a ton of tag blankets for sale on Etsy and tutorials online (just google "ribbon tag blanket" and you'll find hundreds of them).
Yesterday, I made Levi his very own Lovie (aka security blanket with tags). It took about an hour to complete. Well, maybe a bit longer because, have you ever tried to find the grain line in flannel fabric? Ugh! Flannel gets totally stretched out and distorted and it's hard to put a thread through to find the grain. I persevered though and am pleased with the outcome.

Here's how I made Levi's Lovie:
Materials:
Two pieces of flannel fabric (I made mine 14 inches by 18 inches, but if I were to do it again I'd make it square)
Four different ribbons in a variety of widths
Iron
Sewing Machine
Thread
Pins
Process:


Note: I didn't take pictures of the process. My bad! But there are a ton of tutorials on the web. I referred to this one on Craftster.org.
Oh, and I'm linking up with Tip Junkie's Tip Me Tuesday this week. Check it out!

I know Levi is not unique in his love of tags, because there are a ton of tag blankets for sale on Etsy and tutorials online (just google "ribbon tag blanket" and you'll find hundreds of them).
Yesterday, I made Levi his very own Lovie (aka security blanket with tags). It took about an hour to complete. Well, maybe a bit longer because, have you ever tried to find the grain line in flannel fabric? Ugh! Flannel gets totally stretched out and distorted and it's hard to put a thread through to find the grain. I persevered though and am pleased with the outcome.

Here's how I made Levi's Lovie:
Materials:
Two pieces of flannel fabric (I made mine 14 inches by 18 inches, but if I were to do it again I'd make it square)
Four different ribbons in a variety of widths
Iron
Sewing Machine
Thread
Pins
Process:

- Cut your fabric and press it.
- Cut your ribbon. I cut eight strips of each of my four ribbon choices. I cut them four inches long.
- Place your fabrics together right sides facing in.
- Make a loop with a length of ribbon and pin it in between your two fabrics with the ends facing OUT. Pin the ribbon. Continue to pin the ribbons between your fabrics, spacing them out in a pleasing manner.
- Sew your fabrics together with a 1/4 inch seam allowance, leaving a three inch space open so that you can turn the Lovie right side out.
- Press your seams open (optional, but worth it!). At the same time, clip your corners to reduce bulk.
- Turn the Lovie right side out and sew the open space closed, either by hand or machine (I did mine by machine and added two ribbons in the space).
- Press.
- Give to your little one for endless entertainment.

Note: I didn't take pictures of the process. My bad! But there are a ton of tutorials on the web. I referred to this one on Craftster.org.
Oh, and I'm linking up with Tip Junkie's Tip Me Tuesday this week. Check it out!
Wednesday, August 31, 2011
WIP Wednesday: The Frustrated Edition
Welcome to another WIP Wednesday! It seems like this is the only thing I'm consistent in posting on this blog. I actually have a few posts in draft, but can't find the time to finish them up. Maybe that should be my goal for the coming week, huh?
Romper Update time: I did not meet my goal of finishing Levi's overalls. This project is making me CRAZY! It was going so well...
 I ironed on the interfacing. Then I read steps five and six of the pattern instructions. I thought I understood what I was supposed to do. I pinned the
interfacing to the body of the overalls and seamed. Something didn't
look right.
I ironed on the interfacing. Then I read steps five and six of the pattern instructions. I thought I understood what I was supposed to do. I pinned the
interfacing to the body of the overalls and seamed. Something didn't
look right.

So I ripped the seams and read the instructions again. And again. And again. And then I consulted a few books. Turns out I was being asked to stay stitch, except the instructions didn't say to stay stitch. Annoying. I was pretty happy with my clipped seams though!

I repinned. And reseamed. And this is what I ended up with:
 This lumpy, misshappen disaster. So I ripped again. This time I basted before seaming. It still looked like crap. I have been unable to get the facings to lie flat after turning it right-side out (or in?). Whatever. It doesn't look good. Something is wrong. I don't know what I'm doing incorrectly. I need help! Please help! Did I cut out the fabric incorrectly (I didn't, I swear!). I am slowly stepping away from this project before I rip it too shreds in frustration. I'll pick it up in a few days and see what I can do it finish it up. Oy!
In other news, I bought fabric for the watch me grow chart and stitched my jelly roll strips together.
 It took me a full hour to decide which strips to use. I arranged and rearranged and finally selected the eight I would use. These are four of them. Adorable right? Next steps are to cut them into smaller pieces and arrange them in a pleasing manner. That's my goal for this project this week.
I'm not sure if I have any readers out there besides my husband and the delightful Sara of Sweet and but if I do, why not leave me a note and tell me what you're working on? It doesn't have to be crafty! Oh, and take a minute to offer Sara of Sweet & Crunchy your healing vibes. She sprained her ankle. Yeah, that's just what she needs, what with being over seven months pregnant and having two kiddos under four to wrangle! Heal quickly my friend.
Romper Update time: I did not meet my goal of finishing Levi's overalls. This project is making me CRAZY! It was going so well...


So I ripped the seams and read the instructions again. And again. And again. And then I consulted a few books. Turns out I was being asked to stay stitch, except the instructions didn't say to stay stitch. Annoying. I was pretty happy with my clipped seams though!

I repinned. And reseamed. And this is what I ended up with:

In other news, I bought fabric for the watch me grow chart and stitched my jelly roll strips together.

I'm not sure if I have any readers out there besides my husband and the delightful Sara of Sweet and but if I do, why not leave me a note and tell me what you're working on? It doesn't have to be crafty! Oh, and take a minute to offer Sara of Sweet & Crunchy your healing vibes. She sprained her ankle. Yeah, that's just what she needs, what with being over seven months pregnant and having two kiddos under four to wrangle! Heal quickly my friend.
Wednesday, August 24, 2011
WIP Wednesday: Jumping on the Blogging Bandwagon
I'm thinking of "linking up" with some of the WIP Wednesday bloggers in the sewing blogosphere. The problem is, I don't really understand the etiquette. Freshly Pieced is a modern quilt blog where bloggers put up thumbnails of their WIPs and then put a badge on their blog. What I don't get is, how are the thumbnails generated? Do I just comment on the blog or what? Aha! There looks like there's an upload tool. Okay, let's try this out. Here's the badge:

In Progress:
I am loving working on the romper that I told you about on Sunday. I cut the pattern out that night and the following afternoon I cut the fabric pieces.

 I've noticed that the majority of bloggers I read don't sew from patterns. I generally come across tutorials where sewists use clothing or accessories they own and like as guides. I learned to read a pattern in my intro sewing class this summer and it's a really great skill to have. Figuring out this pattern without my instructor around to ask questions provided some challenges which I'm happy to say the internet, plus The Sewing Bible, solved. For example, stay-stitching. I had no idea what this was. Now I know! It stabilizes fabric to prevent stretching during the sewing process and does not show in the final garment.
I've sewn the centre seams and the two side seams, including finishing the seams (with a zig zag stitch), plus finished my edges. I'll admit that my seam ripper got put to good use. I read recently that one should not hesitate to rip seams one is unhappy with and I took that to heart. Why end up with a product I'm not totally proud of, right? I also had to take an extra trip up to Fabricland because I didn't buy snap tape before and the project really needs it. I think I am about half done this project. Next steps are interfacing for the front and back tops of the romper, finishing all the hems and buttons. I'm going to use these huge red buttons I've had for a while. I don't think I'll make button holes though. I'm planning to use velcro instead.
My goal this week is to finish the romper by next Wednesday so that I can post photos of L in it for you to see! I'm making the 12 month size, so it'll be big, but he looks cute in anything!
Queued: I'm going to take the plunge and commit to a quilting project. I want to make a growth chart and I'm deciding between two tutorials. The first is The Embroidered Growth Chart from The Longest Thread, and it actually a guest post from from Emily of The Student/Teacher, who I started reading a couple months ago. I really like the simplicity of the design, plus it doesn't require a ton of fabric. The other is the Watch Me Grow Chart from Moda Bake Shop and is by Crafty Gemini. There is more piecing in this project which is good from a learning perspective and it also requires just a jelly roll, plus two yards of additional fabric. I'm not leaning one way or the other.
My goal for the week for this project is to pick a tutorial and the fabric. I'm going to have to do my buying online. I called all the quilt stores in Toronto and no one carries Moda jelly rolls. I was really surprised since they are so popular on the blogs.
Can't wait to hear what Sara has been up to this week! And anyone else who's been working away. Join in the fun!
In Progress:
I am loving working on the romper that I told you about on Sunday. I cut the pattern out that night and the following afternoon I cut the fabric pieces.


I've sewn the centre seams and the two side seams, including finishing the seams (with a zig zag stitch), plus finished my edges. I'll admit that my seam ripper got put to good use. I read recently that one should not hesitate to rip seams one is unhappy with and I took that to heart. Why end up with a product I'm not totally proud of, right? I also had to take an extra trip up to Fabricland because I didn't buy snap tape before and the project really needs it. I think I am about half done this project. Next steps are interfacing for the front and back tops of the romper, finishing all the hems and buttons. I'm going to use these huge red buttons I've had for a while. I don't think I'll make button holes though. I'm planning to use velcro instead.
My goal this week is to finish the romper by next Wednesday so that I can post photos of L in it for you to see! I'm making the 12 month size, so it'll be big, but he looks cute in anything!
Queued: I'm going to take the plunge and commit to a quilting project. I want to make a growth chart and I'm deciding between two tutorials. The first is The Embroidered Growth Chart from The Longest Thread, and it actually a guest post from from Emily of The Student/Teacher, who I started reading a couple months ago. I really like the simplicity of the design, plus it doesn't require a ton of fabric. The other is the Watch Me Grow Chart from Moda Bake Shop and is by Crafty Gemini. There is more piecing in this project which is good from a learning perspective and it also requires just a jelly roll, plus two yards of additional fabric. I'm not leaning one way or the other.
My goal for the week for this project is to pick a tutorial and the fabric. I'm going to have to do my buying online. I called all the quilt stores in Toronto and no one carries Moda jelly rolls. I was really surprised since they are so popular on the blogs.
Can't wait to hear what Sara has been up to this week! And anyone else who's been working away. Join in the fun!
Sunday, August 21, 2011
Retail Therapy
I woke up today feeling entirely blah. What to do? I was itching to start a sewing project, but couldn't find any inspiration in my stash. Enter retail therapy! I had a bottle of pumped milk in the freezer and my dear husband was happy to mind the baby while I took a quick jaunt up to Fabricland. Here's what I picked up:
 These adorable flannel prints are going to make a sweet baby quilt. That's green bias tape in the package there and I also got some batting. I'm planning to use Prudent Baby's Beginner Baby Blanket #3 tutorial. This will be a gift, but I hope I can eke out something little for Levi with the scraps, like a soother clip perhaps.

The only new fabric is the middle one in the above photo. These will become a patchwork something. Maybe pillows for the living room. Or a tote. I love the prints and I'm slowly collecting additional pieces that match. This could become my first quilt. We'll see. Clearly I am undecided.
 Now, this is the piece de resistance! That striped fabric up there? It was $2.50 for the entire yard. It was in the remnants bin. I think it will make a sweet romper. I decided to buy an actual pattern rather than wing it. This particular pattern has seven clothing items so it was totally worth the price. I can see myself making all of the items, but the romper will be first.
The new fabrics are currently being washed and dried. I'm going to start cutting my pattern. Exciting!
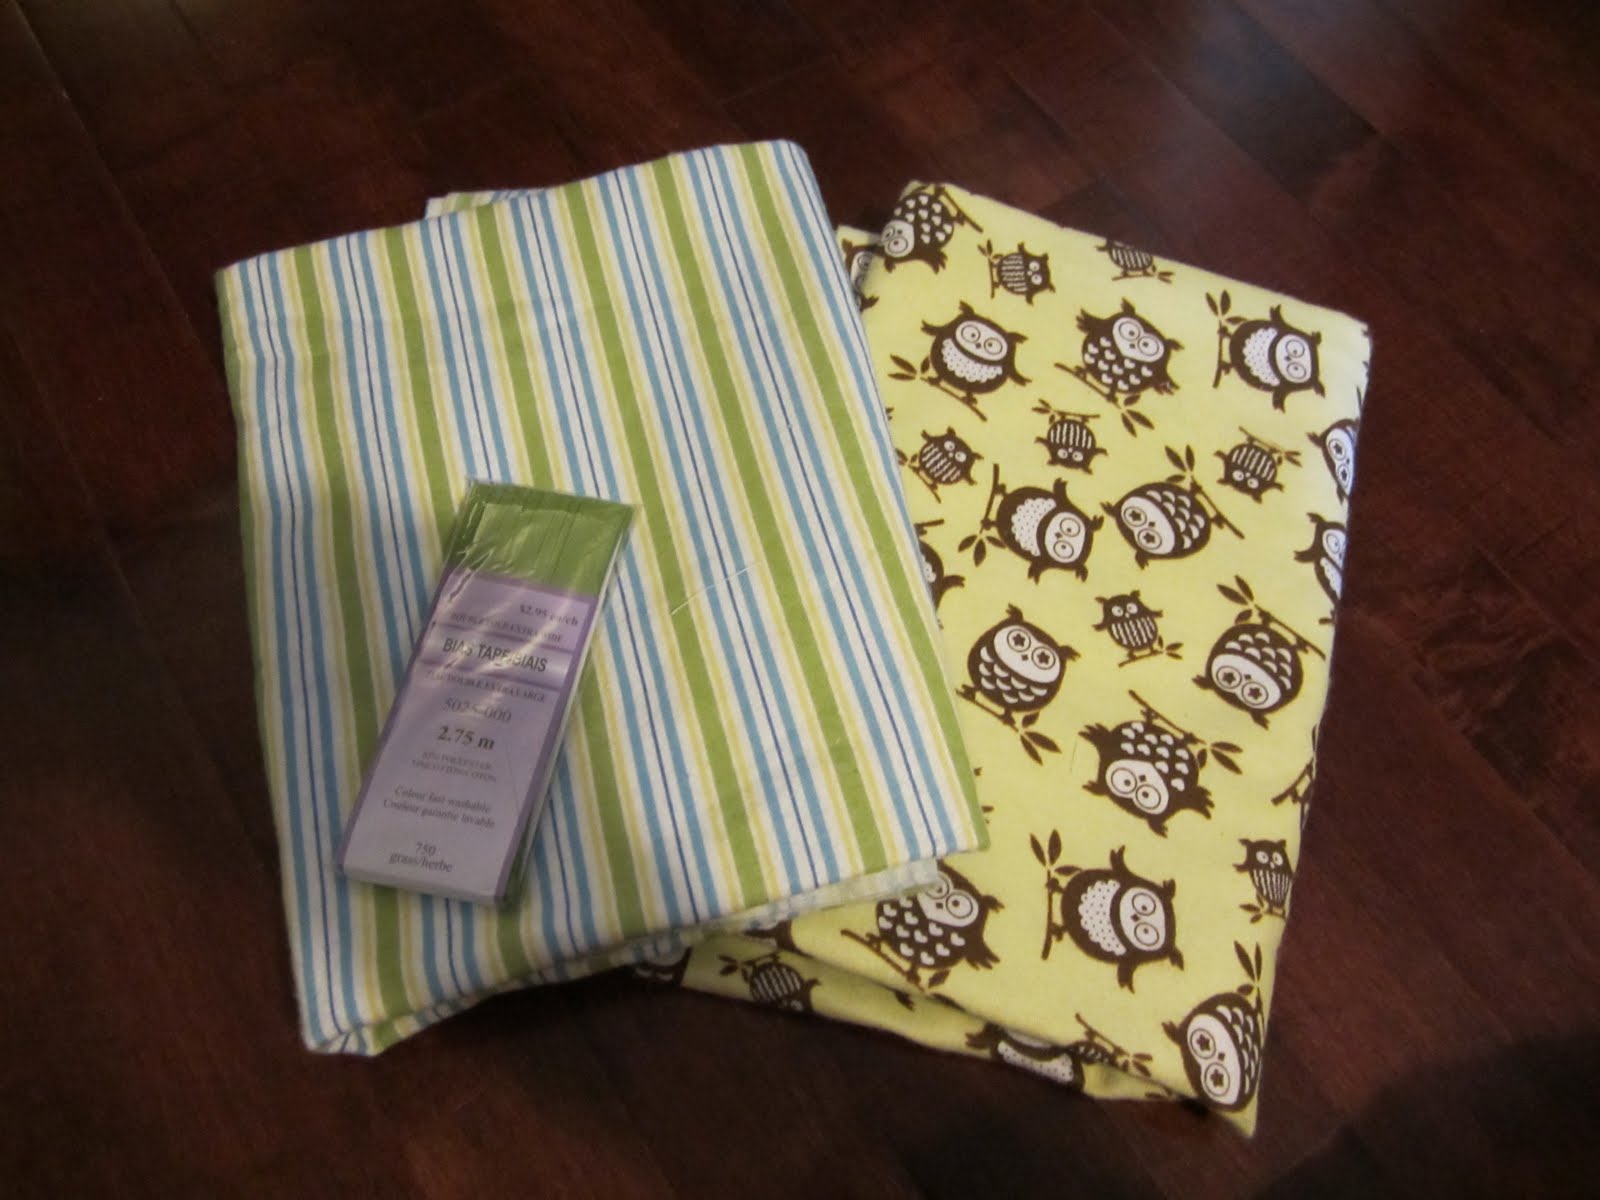

The only new fabric is the middle one in the above photo. These will become a patchwork something. Maybe pillows for the living room. Or a tote. I love the prints and I'm slowly collecting additional pieces that match. This could become my first quilt. We'll see. Clearly I am undecided.

The new fabrics are currently being washed and dried. I'm going to start cutting my pattern. Exciting!
Saturday, August 13, 2011
Boy Pants: Will They Fit?
I've been working on a pair of pants for Levi. I decided to follow a tutorial rather than buy a pattern. I chose Made's Knee Pad Pants which are pretty freaking adorable. Using a pair of Levi's pants that are a tad too big, I drew a pattern according to the instructions, and cut my fabric. Everything was going swimmingly, or so I thought. I sewed the crotch seam and the inner legs. I cut the oval knee pads and began to sew them on. I found this rather difficult and my seams are not even close to perfect, but these are rough and tumble pants so I'm okay with it. I'm even willing to show you my terrible seams! Note, the oval will be filled with straight lines.

At this point I decided to put them on Levi to see how they were fitting. And this is when I discovered that the legs were too narrow. Oy! The fabric is a thin denim with no stretch. What to do?
Enter side stripes in the same co our as the knee pads. Right now I'm basting them and then I'll try them one Levi again to make sure they fit! I'll keep you posted.

In other news, we had begun solids. Despite his expression in this photo, Levi is loving food. Last night he devoured patty pan squash. My concern that the slightly bitter taste would turn him off was totally unfounded. The boy likes him some vegetables!

Whatchu lookin' at Mama?
Saturday, July 30, 2011
Made
Front

Back

I used this tutorial from Sew Craftilicious. My hand sewing is pretty terrible and also much too visible. I could have taken more care, but chose not too for the sake of time (it's after midnight and I should be sleeping).
Wednesday, July 20, 2011
WIP Wednesday
Have you noticed that I only manage to post on Wednesdays lately? Yeah, me too. Once again, I blame the baby. Also, I would like to correct an error in last Wednesday's post. I referred to Sara, as SaraH. Since I totally hate when people misspell my middle name (Anne, with an "e" like Anne of Green Gables) I feel compelled make this correction publicly. Sara, sweet lovely woman that she is, did not point out my error. Moving on...
Completed: the Four Square Bag

Pretty good for a newbie right?

My seams don't match up perfectly, which bugs me, but as my sewing instructor said, if I don't point it out, no one will notice. Ooops! Pretend I didn't just point it out, okay? I plan to use this bag as a gift bag, because I didn't put any pockets in it and it's a little busy to use as a purse. I might use it as the gift bag for my "in progress" project (like my segue way?)
In Progress: Sally's Tote
I'm using the Reversible Tote pattern from Lexie Barnes' Sew What! Bags book. Her subtitle states that all the bags in the book are patternless, but they look like patterns to me. Is the fact that there aren't sheets of paper to trace and cut out what makes them non-patterns? Maybe they are tutorials instead.

So far I have washed and ironed the fabric. I hope to cut out my pieces tonight, but my teething child may have other ideas, so if this gets completed by next Wednesday, I'll consider myself successful.
Also In Progress: Pajama Pants
Week three of sewing classes went well. I have completed the seams of the pants and "zig-zagged" the edges of the seams to prevent fraying. Next week I'll add the waist pieces, hem the pant legs and attach the drawstring.
It's been interesting to see what other people in the class have chosen to make. Dresses, pillows, pleated pants (really?!)...despite the teachers instructions to keep it simple. It looks like only three of us will actually complete our projects. We are the three who chose pajama pants or an a-line skirt. We are also the only three people to actually begin sewing. Everyone else is still cutting out their fabric or basting.
Okay, so that's all I've got. What did you work on this week?
Wednesday, July 13, 2011
Work in Progress Wednesday: The I Can Sew Edition
First things first, I must share that I bought a sewing machine and I am totally enamored with sewing. So much fun! I bought a Kenmore and so far so good.
Second, I realize that I missed last week's WIP post. No excuse, just a really busy week and with an attention seeking 5 month old, it's hard to find time to update the blog. I did some crafting last Tuesday with the delightful Sarah of Sweet & Crunchy and her lovely daughter. We made egg carton caterpillars which made me anxious for my little one to reach crafting age (we're a long way off!).
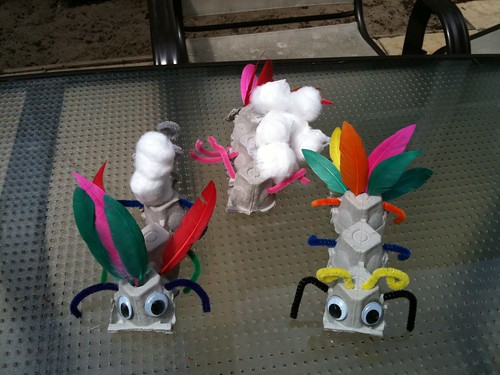
And now for this week's projects...
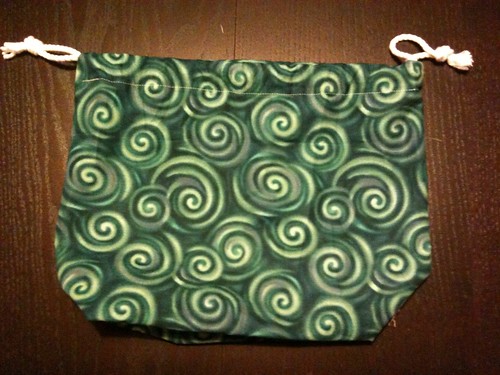
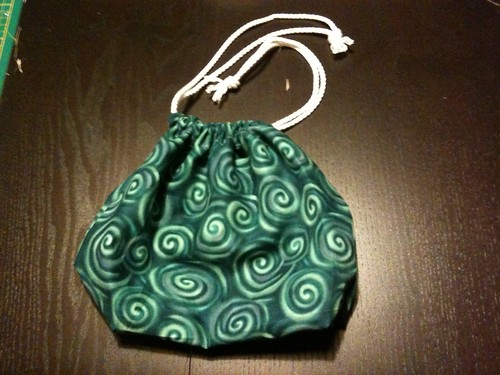
Started and finished: The draw string bag
I made a bag! My first sewing project! Big excitement!
I used a tutorial online which, sadly, I can't find for the life of me. Ah well. My technique wasn't perfect and I ended up with messy seams but overall it's a good first kick at the can and the next one will be cleaner.
In Progress: Scrappy Bag
I'm using the Four Square Bag tutorial by Adelaide Lemonade. I have a ton of pink and green printed fabrics that I've gathered from various home improvement projects and this bag is a good way to use them up. So far, I've cut and seamed half of the outer part of the bag. I hope to finish this bag by the end of the weekend.
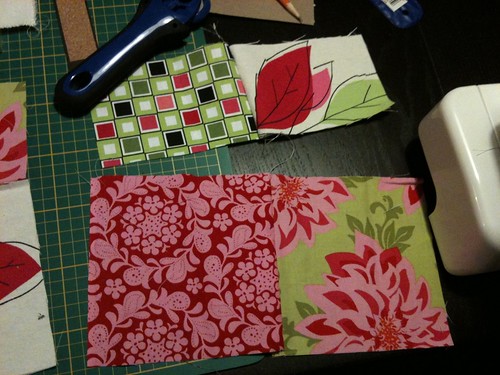
In Progress: Pajama Pants
This is the project I'm completing in my sewing course. It's a very simple pattern. Last night we learned how to read a pattern, cut pieces and baste. I have to finish basting my seams for the next session. I have learned that I still haven't mastered cutting in a straight line. If you can do this freehand, I envy you this skill.
To Do: Sally's Tote
My boss is turning 50 and I've decided to make her a tote. I've purchased three coordinating fabrics (a yard each so I'll be able to make several small projects) but haven't yet settled on a tutorial or pattern. Deadline is August 8.
Updates on Other Stuff
My Pin Tuck Tee is stagnating, due to my new sewing obsession. I have knit maybe 10 rows in the last two weeks. I'll get back to it soon.
I did tidy my stash into cute green bins. My knitting stash that is. Problem is I now have a burgeoning fabric and sewing notion stash. As I live in an open concept condo, my crafting seems to have taken over our main living space. My husband is humoring me for the moment. He knows I'm messy but I wonder how long it will be until he wants the dining room table available for breakfast and such.
Nu? What are you working on?
Subscribe to:
Posts (Atom)